Make a new geo object named FluidSim, inside make 3 primitive sphere, merge them together. Position them around in a triangle formation, The size and position doesn't matter too much.
Make a Flip Dop source node, you'll see that they're now voxels. These will be the sources of our fluid sim.
When you want to preset a velocity, you have to manipulate the points attributes. Velocity acts on a point. You look for the v attribute, and you set the v attribute to some sort of vector. v = (x,y,z)
Make a new polygon sphere, make it big enough so that it intersects all of our other spheres.
A point is a position of information, a vertex is associated with a polygon, which is why when you look closer at these green lines, there are 6 of them. Change add normals to points and you'll see only one line now.
Now create an attribute transfer node so we can transfer the normals. Make sure on the normal node you check 'Reverse Normals' to true.
Now we want to have a little arc of water before it goes down, so go to the sphere and change the position of the source sphere upward.
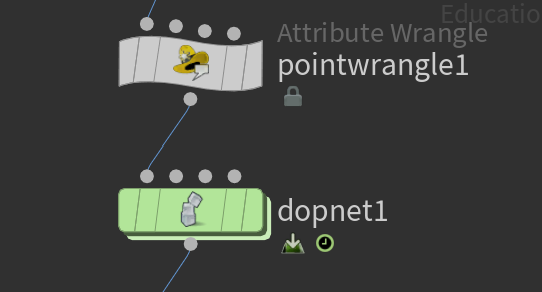
Create a point wrangle with this vexexpression:
@v = @N *5;
We're setting the velocity equal to 5 times the normal vectors, (normals should be normalized, so 1).
We're setting the velocity equal to 5 times the normal vectors, (normals should be normalized, so 1).
Now we'll make the bathtub. Put down a tube sop. Change the radiuses and height to make it similar to a basin. Make sure its a polygon. We made it 50 columns.
We want to extrude the top face. Turn on the polygon numbers to see which face number is the top. For us it was face 0. So in the group we put in '0'.
Create another polyextrude node. The face numbers changed again so find the inner face again to extrude it downwards.
We used an edit node afterward to make the basin even deeper. We took the inner face numbers and outer face numbers and then changed the translate y to a negative number to stretch it out.
Add a null output node and you're done with the basin.
We used an edit node afterward to make the basin even deeper. We took the inner face numbers and outer face numbers and then changed the translate y to a negative number to stretch it out.
Add a null output node and you're done with the basin.
Making the Dop net:
Create a dop network node and go inside it. For a dop network we need a source, a fluid object (houdini abstract object that acts as a place to receive it. An abstract database to store the data), and a collision system. Create a volume source node. Change initialize to Source Flip. This reinitializes the node. Change input to first context geometry. This will make it so that the first input on the dopnet node will feed into this node.
Create a flip solver node. First input should be the flip object and the fourth input should be the volume source node you've made.
Press alt+e on the 'particles per voxel' parameter. write this expression in the expression editor:
ceil(pow(ch("../flipobject1/gridscale"), 3))
This gets the grid scale of out flip object, raises it to the power of 3 and then rounds it up.
Now we need a static object node for our basin. Change the parameter SOP Path to our basin geo.
In the static object node, Change collisions > Bullet Data to concave and collisions>rbdSolver > collision detection to 'use Surface Collisions'.
Now add a static solver for your static object, a merge node to merge it with the flip solver, and then add a gravity node to finish it.
Outside the DOP network, add a particle fluid surface node, change the voxel size to 2 so its more simple and takes less time to compute
Then get a ROP node and export. Should be similar settings as before.
INTO UNREAL
Importing into Unreal, make sure generate missing collision is on, vertex Color Import option is replace, and Normal import method is import normals and tangents.
For the static mesh, look into it's details tab and find 'UE4 Compatible UVs' make sure it's ticked on.
Bring in all the images that were created. For the exrs, make sure you right click > Scripted Asset Actions > Houdini Config Textures for VAT (HDR). For the png image (the color lookup table), you need to use the SDR option. You'll know it works if filter should be nearest, and texture group for exrs should be 16Bit Data and the png should be 8Bit Data for SDR.
Material is the same setup as before. Tangent space normal is off, need 4 custom uvs and bring in the houdini vat node for dynamic remeshing.
Material is the same setup as before. Tangent space normal is off, need 4 custom uvs and bring in the houdini vat node for dynamic remeshing.
Make a material instance, and attach the rotation, position, and lookup table images to it. Apply it to the mesh. If the mesh looks weird at first, close Unreal and open it back up. This may fix it.
Note: i had an issue where i had ray traced shadows setting was turned on and i was getting shadows as if the polygons were still floating in space. Turning it off fixes it.


No comments:
Post a Comment