- We skipped last weeks but I'm still going to call this week 4 -
VDB Smoke Part 1
We'll be using raymarching (raytracing's dumb cousin) to help render the smoke, cause at the moment its the only thing that works well and fast.
Setting up the Geometry
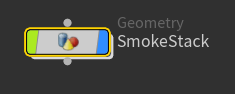
We first need some geometry. Make a geo node named 'Smoke Stack'. Drop inside and create a polygon tube SOP node. Change the parameters so that the radius is (0.9, 0.9), height 10, rows 2, and columns 30. You don't need the end caps on.
We're going to make the smoke come out of the smoke stack.
Add a Match size node to have it sit on top of the origin.
Append a PolyExtrude SOP. Distance is 0.1 and make sure you're outputing all the groups
We want to put a cap around the top. SO grab another tube sop.
We want to procedurally put the second tube to the top of the first tube. We can do this with a transform node.
Inside the transform node, in the translate y input write: ch("../tube1/height")
This is getting the float from the first tube to use as the input. If you left click on the 'translate' text, it will change back to the actual number it's using. 'Ch' means channel, means when we're getting the channel value using the path we give it. This is Hscript (not as great as python)
If you wanted to write a multiline hscript or python script, while selecting the input, hit ctrl +e to bring up this window.
Back to the tube, it's moved up to the height of the column, but it's not flush to the top of the first tube.
To change this with the transform node, write this in the y input box:ch("../tube1/height")-0.5*ch("../tube2/height")
Extra note: this can also be achieved by using a matchsize node, with the y being max.
Get another Polyextrude node with a normal node to thicken up the second tube. Then merge the two tubes Note: We need a null node for the tube1 to reference for later. Put it right before the merge node.
We need to uv unwarp this tube to put into unreal. Drop a uv Texture node. Change the texture type to cylindrical. There might be a weid boundary seam, so turn on 'fix boundary seams'.
Make an null node for the output. To change the colors of nodes, press c on the keyboard. Change outputs to green, and then the tubes to yellow (yellow means the start of a network). Drop an ROP FBX node to export the geo. Just make the output file something like $JOB/geo/SmokeyPole. (Make sure you've set your project beforehand)
Save to disk to save out your geo.  |
| The Final network |
Making the Smoke
Go back to the object level. Create a new geo node named Smoke. Drop inside
We want to get a reference of the smoke stack we made. Drop an object merge node down. For object 1 look for STACK_CENTER from out SmokeStack. Choose to give a relative path.
In transform object, write '.' (Literally just a period) inside of 'Transform Object'
This means that we want to transform the referenced object in local space.
Drop a match size node with Justify Y set to max.
Now we need to create an object to act as a burn source. Get a polygon sphere node. Change the Radius to (1, 0.8, 1). Change primitive type to polygon and the frequency to 4
We want to have irregularity with the smoke. If you check the normals of the sphere, you'll notice they're created in a uniform fashion.
 |
| uniform normals |
We don't want that. Create a mountain SOP.
The name 'mountain' is a misnomer, It's putting the vertices through a 3 dimensional noise space. It's currently using simplex. Change amplitude to 0.66.
Go back to the pyroSource (sphere) node and lower the uniform scale so that it approximately fits within the smoke stack.
We're not going to be using DOPs for this, instead we're using sparse convulution for this.
Drag off the mountain node and look for pyro configure billowy smoke
It will give you several nodes. Change the torus that appears for the sphere we've made.
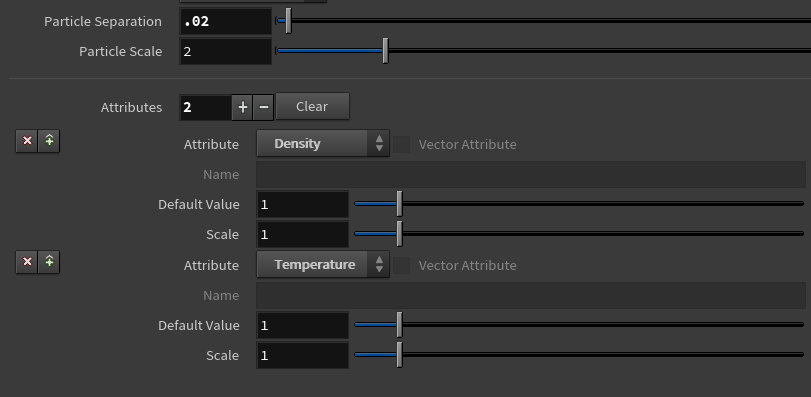
The particle separation determines how close the particles are to each other, lower values mean more particles. We'll change ours to 0.02.
For the other parameters, Density refers to the smoke density, and the temperature drives the speed of the smoke as it rises. The hotter it is the faster it will rise up. You can see these attributes in the geometry spreadsheet.
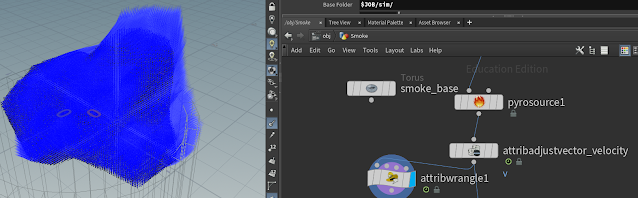
The next one is controlling the velocity of the smoke particles. By default the velocity of the smoke is (0,1,0), meaning it points in an upward direction.
To see what this node is doing, drag off to the side and create an attribute wrangle node.
VExpressions run parallel, on as many particles at once. Write:
v@N = v@v;
This does nothing at first, but you can see it when you display normals in the viewport. The normals will point in the direction of the velocity of points
Change the attribute adjust vector to a point velocity node.
Parameters you can change:
- The scale changes the magnitude of the vector.
- Cone angle allows for a wider angle of where the velocity goes.
- Curl Noise adds more perlin noise to make it more varied. (we had it at 0.5 and then changed it to 10 (makes it look more like a burst of dirt rather than smoke, so do with it what you wish))
The Volume rasterize attributes node transforms the shapes into a volume. If you click on the info of the node, it has 3 VDB volumes, density, temperature, and v. You can also see the voxel (3d pixel) size.
Next, the Pyrosolver. Make sure the start frame is 1. Now hit play with the pyrosolver to see the smoke.
Parameters to change:
- Setup:
- change the voxel size to make it bigger and courser 0.25
- change cache memory to something like 20000 so it will actually remember the cache when you play through the timeline, instead of forgetting the last thing because memory ran out (note: this is resource intesive)
- Sourcing:
- density input source scale is 3
- Changing the source temperature source scale to 15 you'll notice it immediately goes up and goes faster (remember higher temp = faster)
- Fields:
- Make sure flame is true.
- change dissipation to 0.08, so it looks more wispy and will disappate faster
- Shape:
- Turbulence changes the frequency and does nothing to the amplitude, it takes all the negative values and makes them positive. Change turbulence to 0.7, you'll get more detail in the smoke
- Change swirl size to 1.2 and roughness 0.7 to make it go up a bit higher. Roughness adds more surface detail to the smoke, more chunk.
- Max octaves to 3, the amount of information in the smoke, we're putting more noise into it.
- Output:
- We don't need the color since we'll be getting that from the raymarching, and we don't need the flame or velocity anymore
At the end in setup, change the voxel size to 0.1 and global substeps to 3. We're done with changing settings so even though it's going to take more memory it'll look better now, and we don't need to worry about recaching multiple times after this. Global substeps is reducing the aliasing experienced by the frame sample. We want more detail between each frame. Think about sampling a sin graph multiple times inbetween the points to get more info.
Since we'll be rendering in Unreal, we don't need the pyro Bake volume and null node at the end. You can leave them be.
 |
| unnecessary nodes |
Its getting slow so we're going to want to save this out as a filecache. We changed the timeline to 500 to get a longer sim.
Tip: Look up Mythbusters for explosions to check out the different types of smoke.
Next week we're going to be making another volume with a pinhole at the top to contain this volume.


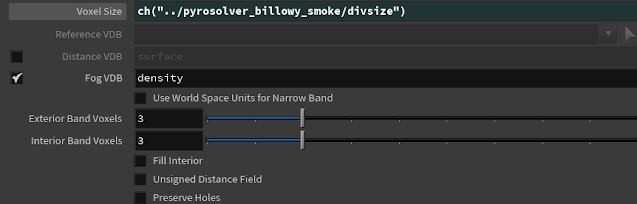


 Now the heterogenous volume should show our smoke (although still tiny). Rotate it 90 degrees and scale it up, and it should be done. This material should also allow you to color the smoke however you want for now.