Thursday, 3 October 2024

Animation State Machines Class Demo Part 2

    This is part two, here's a link to part oneWe're Finishing up the ASM today. We're adding the rest of the animations, as well as adding the transitions between all of them, and creating a new map with a GameMode Blueprint. 

Transitioning between States

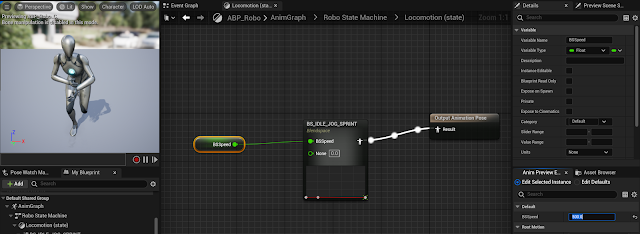
    Open up back up the ABP_Robo Animation blueprint.


    Left mouse click on the orange edge of Locomotion, search for 'add state' and rename the node 'Hit The Ground'. Dive into this node, and inside the asset browser look for 'Stand_to_prone_retargeted' and drag it into the editor. connect this new node to the result output node.


    You will get a warning saying it will never be attainable. To fix this go back up into RoboStateMachine and double click on the dot in-between the nodes


    Add a variable in the my blueprint tab, name it "Firing!". Drag it into the editor. 


    When you recompile you should get rid of warning/errors. Go back into Robo State Machine, inside the Anim preview editor tab, you can see there's a "Firing!" option under BSSPeed variable. Click on it to test if Quin will hit the ground. 
    If it works Quin should be on the ground. However we haven't set up the transition to get back up. So you have to recompile to get her back.
    Add a new state from HitTheGround. Name it 'FiringRifleLoop'. Inside the transition, create a Time Remaining (ratio) node. 


    Time Remaining (ratio) is keeping track of what the previous animation time is at. If the animation clip is at 1, then it's at the beginning. If it's at 0, then its at the end. It is determined by how much time is remaining. We want it at a little bit before 1 so it blends between the transition.
    Create a less than (<) node. Plug into the top input the time remaining node. For the bottom input node, click on it and promote it to a variable. Rename it to 'Time Left' and change the default value to 0.3.

    What this is doing is it is going to stay in the prior state, wait until its about 2/3 complete (think 1-0.3) and then make the jump to firing. 
    Go into FiringRifleLoop, look for Prone_Fire2_retargeted. In the details tab make sure you go into the details tab and check "loop animation"


    Check if it works by clicking on isFiring Variable.
    Create a new state off of FiringREifleLoop, name it 'BackonYourFeetSoldier!'


    Go into the transition state. Grab the Firing variable into the editor. Get the node "NOT Boolean" and connect it up. We want Quin to stop when Firing is false.

    Remember to Compile to get rid of any warning errors.
    Now go into the Back on Your Feet Soldier node. Look in the asset browser for 'Prone_To_Stand_Retargeted' and connect it up.
    Now when we play, we can check and uncheck the firing variable for quinn to go down, fire, and get back up. But we haven't put her back to her Locomotion, and she becomes stuck after getting back up and can't get back down again. Make a final transition back to Locomotion state
    Inside the transition. Get another Time Remaining Ratio, with a less than node, and get the Time Left variable again. 

    Now Quin should transition between all states.

Talking to the Character Blueprint

    Go into the event Graph for our Anim Blueprint. We wanna know how fast are we really going from our character blueprint. Click on 'Try get pawn owner' return value, and make a 'get velocity' node. 

    The yellow output means it is outputting a vector data type. Make a 'vector length' node and connect it here. It's going to convert that vector into a float value. From your variables drag and drop BSSPeed into the editor and create a 'set BSSPeed' node. Connect it to the Vector Length. 
    Now we want the isFiring variable from the character.
    We need to convert the pawn into a data structure that corresponds to a character blueprint. We need to transform our data representation into an actual instances of a character bluepriont (this is called casting, when you transform a pointer into an actual data class)
    From the Get Param driver, drag off of the return value, look for 'cast to Bp_Quin'
    We're basically saying that this part is a BP_Quinn blueprint, which once we drag off a line from the 'As BP Quin" output, we can look for the "Is Firing" variable from that blueprint.
    TIP: If cast to BP_Quinn is not showing up, load it into memory by double clicking on it in the Content Browser to open its editor. Now try finding the 'cast to BP_Quin' node
    Then drag out our Firing variable and make a 'set' node. From the Cast to BP_Quin node, drag out from 'As BP Quin' a "Is Firing?" variable (remember we're able to access this variable from the character blueprint because we're casting). Connect the "Is Firing?" variable to the Set Firing! variable. (Also make sure you're connecting the white line between all of these nodes. 
    

    Understand that casting is slow, you will be urged to stop casting and can take up a lot of memory. It's cumbersome. But it's fast to setup and good for Prototyping. Later we'll use Blueprint Interfaces, which allows you to talk between blueprints. 
    That's all we need to edit from our event graph for our Anim blueprint.

New Map


    We need a special blueprint to talk with the Unreal Engine to tell it what game mode it is. Make a new level, name it MyRoboMap/
    Now create a new blueprint class, look for GameMode (not game mode base, you'll have to go under all classes and search GameMode). Rename it to RoboGameMode.


    All we're doing is changing the default Pawn Class to our BP_Quin.
    Go to world settings, change the GameMode Override to to our RoboGameMode.


Fixing Skating LATER

Go back into our ASM, into the Locomotion State.

NOTE: If you are using ANYTHING other than a character blueprint with an animation blueprint, you have to use 'Get Owning Actor' node instead of 'Try Get Pawn Owner". It will not work otherwise. 

Tuesday, 1 October 2024

Animation State Machines Class Demo Part 1

     We're going to be making the character hit the ground and fire a gun and then get back up. Here's a link to part two. 

Notes from the Animation State Machine Lecture Powerpoint

    The Character Blueprint has movement, mesh, event graph, and then a pointer the Anim Blueprint. The Anim blueprint controls the articulated motions of the character skeletons. It has the AnimGraph, event graph, and the animation State Machine. The Animation State Machine (ASM) has blend spaces, states, conditions. An ASM has a node graph that connects what state the character should be in determined by conditions. 

    The Character Class is a child of the Pawn class, which is a child of the Actor class (think of the character class as just a fancy actor blueprint).

    In real time rendering, you will be working with an ASM, they do it the same way in Unreal and Unity.  EA has ANT (Animation Toolkit).

Setting up the Character BP

        Open up the TechArt_ASM_HW7 file that was given to you. Go into the Tech Art folder and copy 'BP_Character'. Make a new folder named 'Robo' and paste the Blueprint into here. Rename it to 'BP_Quin'.


Inside the Tech Art folder


Inside the new Robo folder

    Ignore that I already have Quin in here, yours should start out with the yellow man.

    Double click on BP_Quin to go into the blueprint editor. Inside here we have a capsule component (our collision field, using this to run into things can help us to interact with the environment), an arrow component (this tells us which direction we're facing), a SpringArm (this is for your over the head camera view, the camera follows the character) and the mesh containing our character. 


    Click on the mesh. We're going to change the skeletal Mesh. Choose 'SKM_Quin_Simple'. Make sure she is facing the x-axis (where the arrow is pointing).


    Change the Mesh's location from -90 to -100. This is to ensure that the character is flat on the floor (we don't want our character floating).

    Click on the Capsule Component, change the capsule Half Height to 90. We want the capsule to cover the majority of our character.


    Click on Class settings at the top toolbar- it will show you everything inherited from the class. In class defaults it will show you a bunch of settings related to your character, physics, animation rig, skin weights, etc. 

    We're going to go into the event graph, which is already set up for you to listen for your inputs.

    We want to know when the player is pressing the f button to know when we're firing or not. Go to the variables and create a new variable. Rename it to 'isFiring?'


    Right after the print string that says 'firing!' drag the variable and connect it to it and set it to true. Use set firing. Do the same thing with the string that says 'stop firing'. 

Setting up the isFiring? variables to change depending on the F key

We're done with character setup, now we're going to the animation blueprint.

Animation Blueprint

    Back in the content drawer, in your Robo folder, right click>Animation>Animation Blueprint. You need to keep the parent class AnimInstance. For the target skeleton we want the 'SK_Mannequin' 

    Name the Animation Blueprint 'ABP_Robo'. An Animation blueprint is always on, meaning you can always interact with it. It's real time. 

    Go to the event graph for this blueprint. It's very similar to the blueprint graphs you've seen before, but the AnimGraph is a bit different. This will have all of our animation composites and montages (we're not doing montages for the moment).

    You have to tell the character blueprint and the animation blueprint to talk with each other. Go back to the character blueprint, either select bp_quin or the mesh (it will update for both so it doesn't matter), in the animation tab in details window, set Animation Mode to 'use animation blueprint'. Change Anim Class to 'ABP_Robo' (the anim bp we just made)

They append an '_C' next to it; unsure of why but just happens

    Our character isn't doing anything yet because we haven't put any animations yet, but they are connected now and will update once we start.

    In the event graph for the Animation Blueprint.

    The 'Event Blueprint Update Animation' is called every time we update animation at the start of the frames.
    A character is technically a pawn, so you can get the character self, which is why we have the 'Try Get Pawn Owner' node.
    Look for the node '? is valid'. Connect it to both nodes to test to see if the blueprint is working.


    When you hit compile, the white line between the two should turn red and it looks like it's sending information to the is valid. This means it is working and our animation is updating (although we have nothing moving yet).

    In the content drawer in our Robo folder, right click > animation> blendspace (there used to be several types, but now its just combined into one blend space). Choose the same skeleton we chose before. Name the Blendspace 'BS_IDLE_JOG_SPRINT'. These will be our Blendspaces between our locomotion. 

Inside the Blendspace we just made

Asset Details Window

    Under Asset Details window, under Horizontal Axis, change the name to 'BSSpeed'. Notice now the bottom graph, the axis changed to BSSPeed, Now change the maximum axis to 500, and change the grid dimensions to 5.
Our graph located at the bottom of the screen
    You can put on another dimension of animation blend by using the vertical axis, but for now we're going to use only the horizontal one. 
    Go into the asset browser to the lower right, look for 'Idle_Rifle_Hip_Retargeted' and drag that into the graph at the (0, 0) coordinate. Get the Jog_rifle_fwd drag it to about the (100, 0) mark, and also the sprint_Fwd_Rifle dragged to the (500,0) mark, 


    Control + Left click in the grid to drag the x icon around and see how the character transitions between the 3 animations. 


    It doesn't matter where you put the green x, it is just there for testing purposes only. 
    Go back to your Anim blueprint. In the Animgraph, create a Animation State Machine (will only say state machine in the nodes list). Rename it to RoboStateMachine. Connect it to the Output Pose. 

    Double click on the state machine to dive into it. 


    In here, drag the output from entry, let go, and then create a new state. Name it Locomotion. Double click on it to dive inside.
    Inside here create a node, look for BS_Idle_job_sprint (our blendspace we just made), connect the pose to output animation pose. Right click on BSSpeed and promote it to a variable. 
    Compiling this will show Quin moving. You can change the BSSpeed to can see the different animations.


    Set the BSSpeed back to zero and go back to Robo State Machine.

You can get back to the higher levels by clicking on these at the top of your graph view


    You can change the BSSpeed from the anim preview window to change the animation from here now. 

That's all we've done for today. We'll continue this Thursday.

Common Art Sprint #6 Delivery

 Final ROM for the JinRoh Rig